Step 1 - Create a Base GoCard
Search:

Step 1: Entering Homepage
Welcome to the step-by-step tutorial on creating your very first GoCard! Ready? Let's go! Firstly, on the homepage of GoCard, sign up for an account or login with an existing account.

Step 2: Signing Up
Fill in your full name, email address, and password.
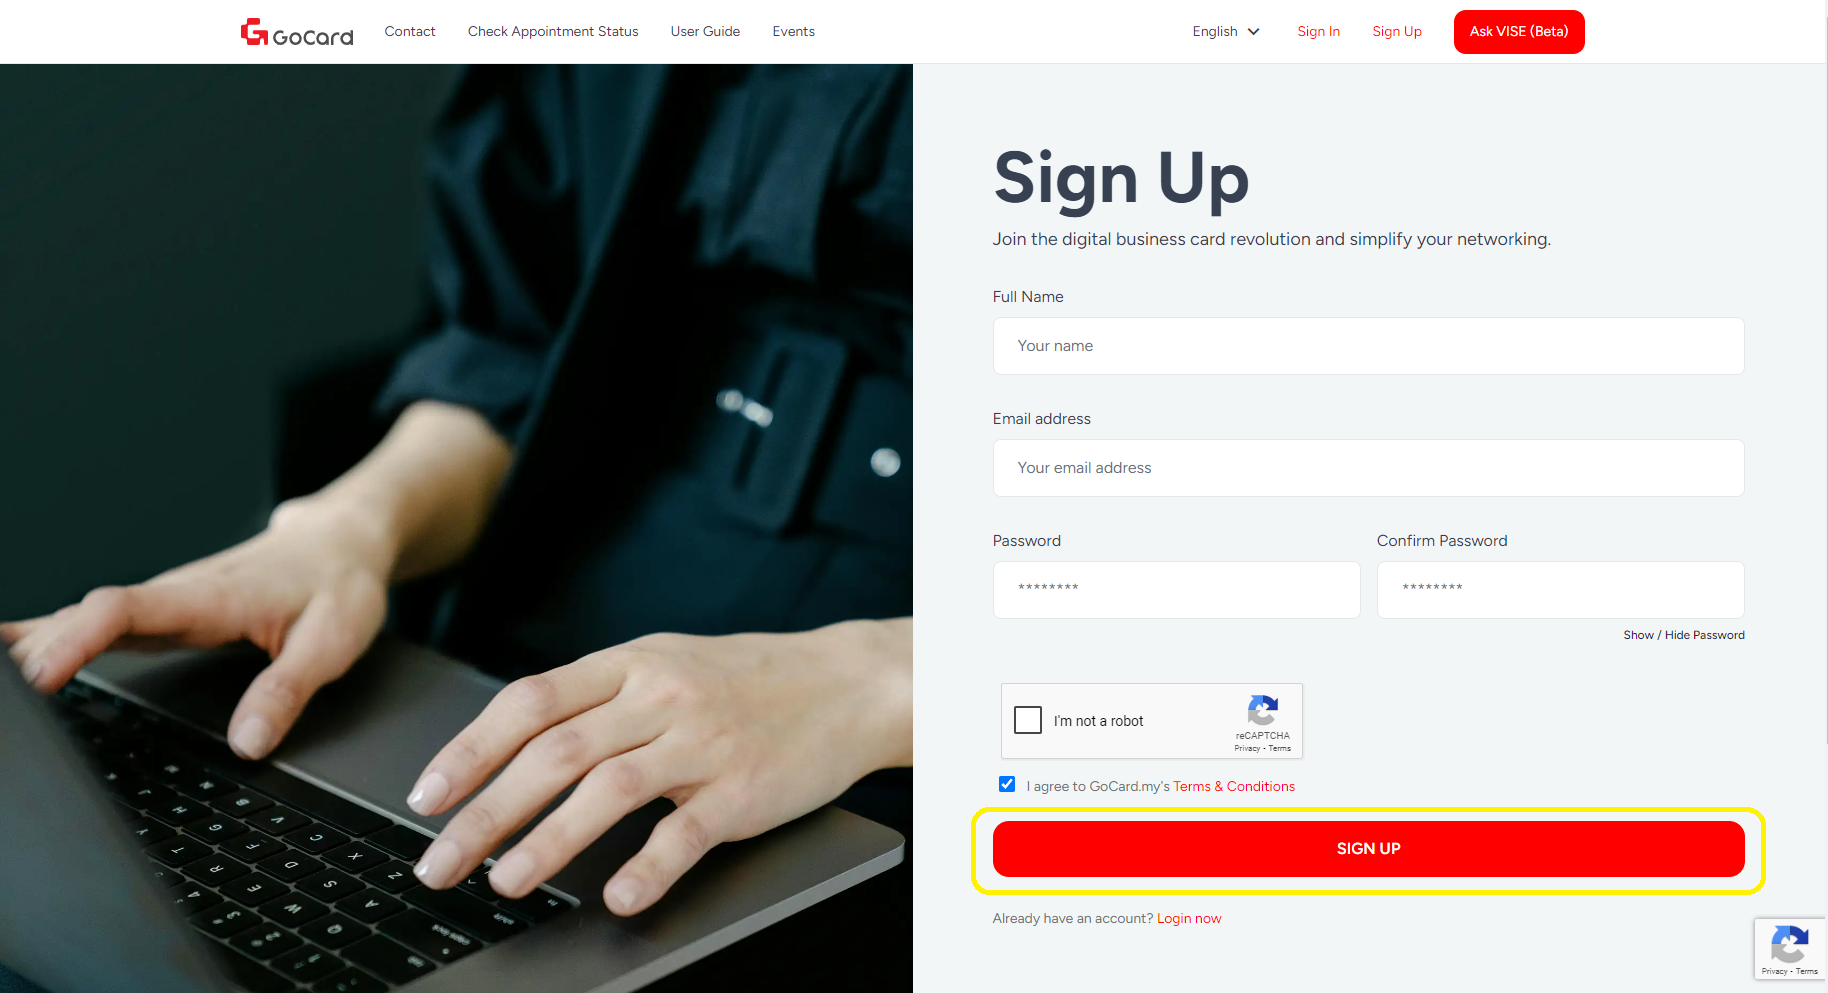
Step 3: Confirm Sign Up
Click on “SIGN UP” to register for a new account.

Step 4: Signing In
With an existing account, enter your email address and password and click on “LOGIN” to login.

Step 5: Creating GoCard
After logging in, click on “Create GoCard” to create a new GoCard.

Step 6: Select Type of GoCard
There are two available GoCard types for you to select, which is “Business” And “Personal”. For this tutorial, we will be creating a business GoCard, so click on “Business”.

Step 7: Creating a Business Type GoCard
There are a total of six available templates for you to choose from. Each template is designed to suit the theme of your choice, aiding you in simplifying the process of creating GoCard.
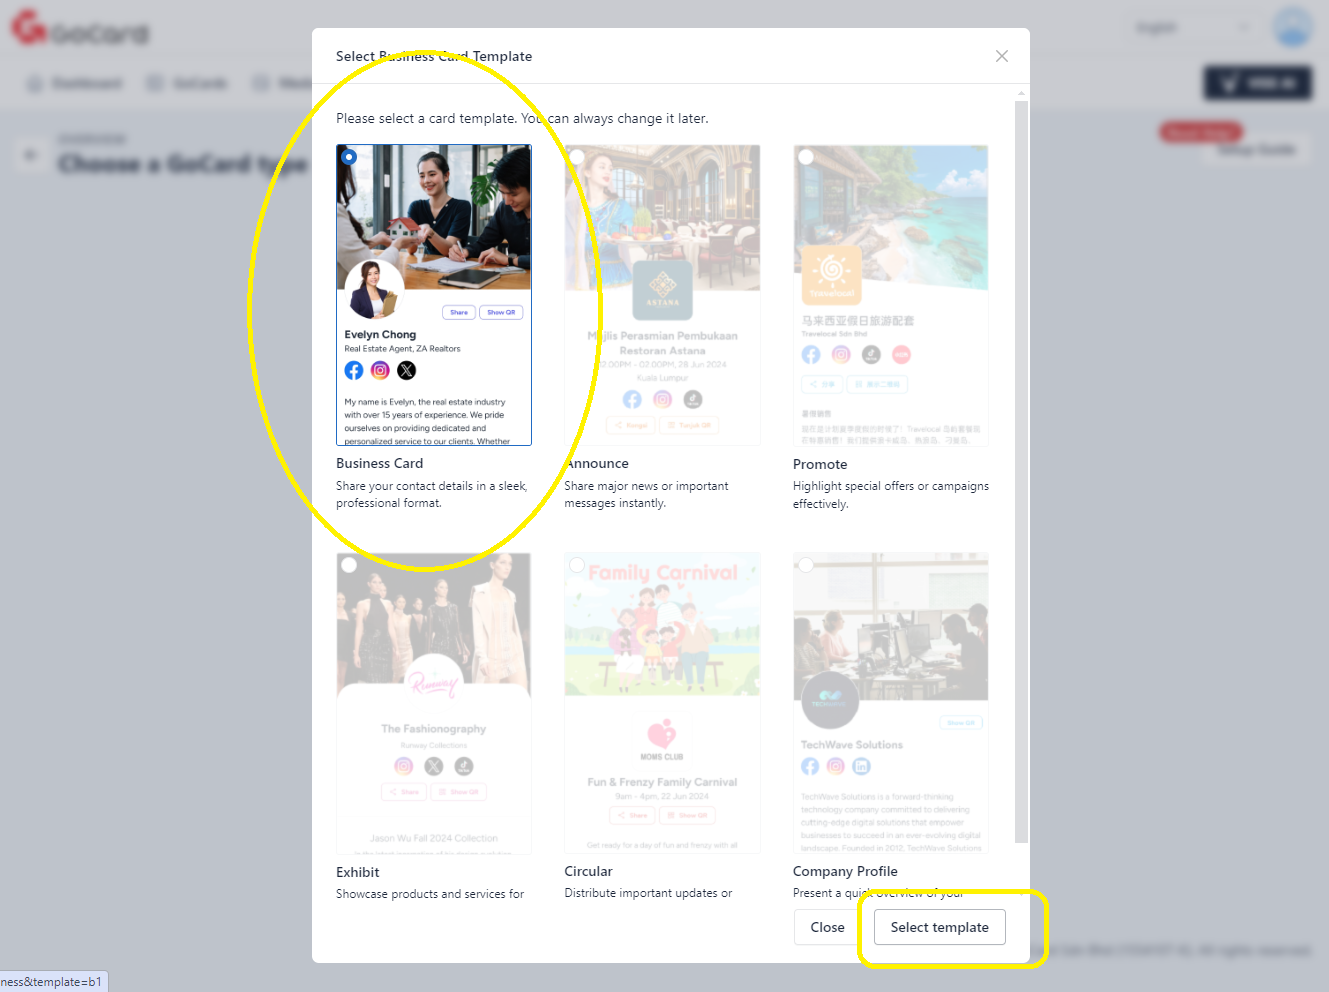
Step 8: Confirming Template
After clicking on your preferred template, click on the “Select Template” below.
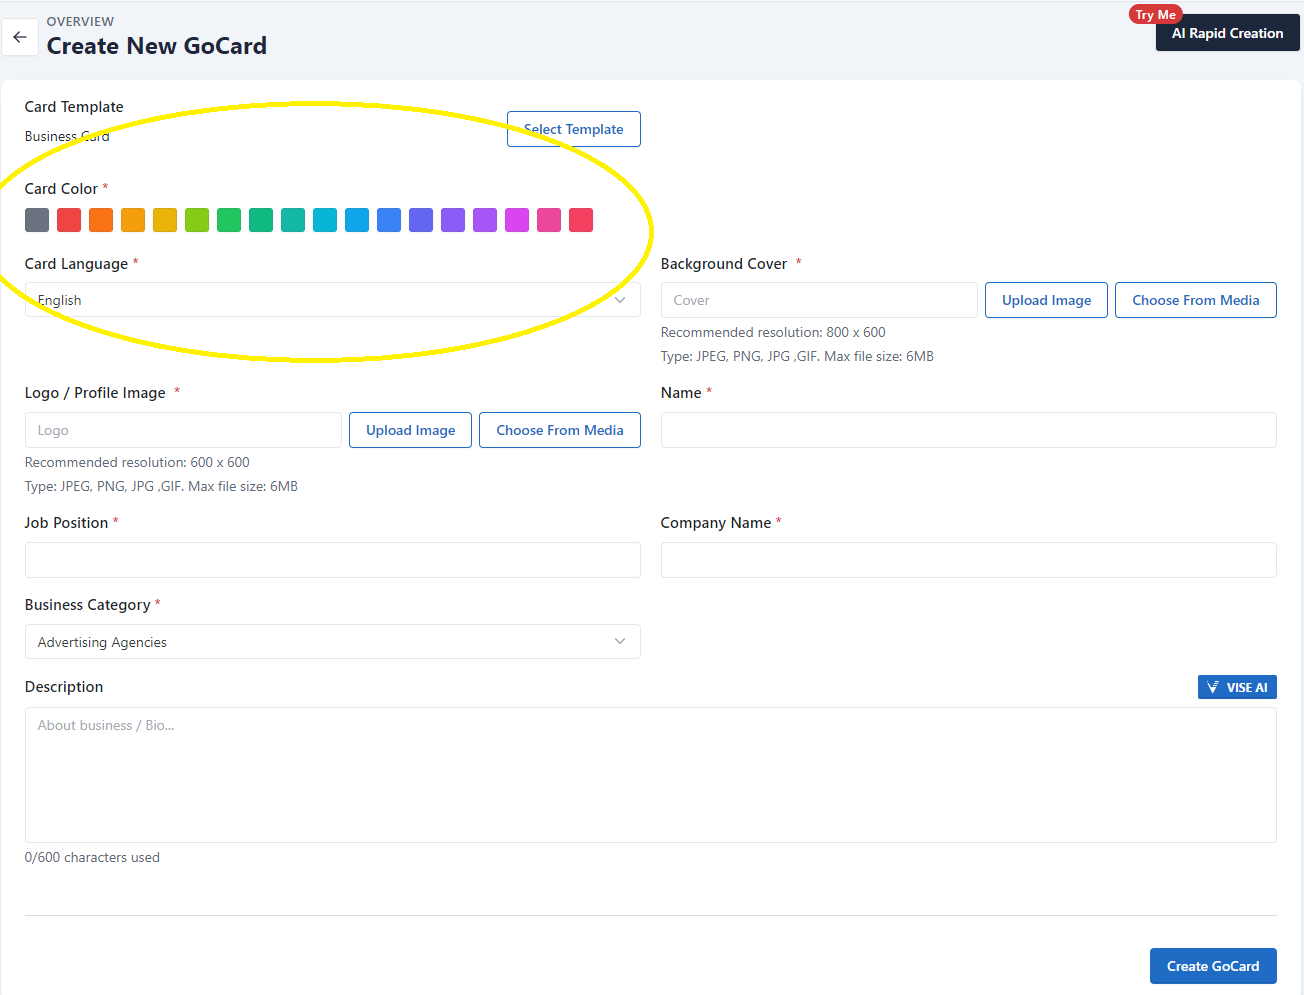
Step 9: Selecting Theme Color for GoCard
You can select a theme color for your GoCard from here.

Step 10: Selecting Language
You can select what language to be displayed in your GoCard from here.
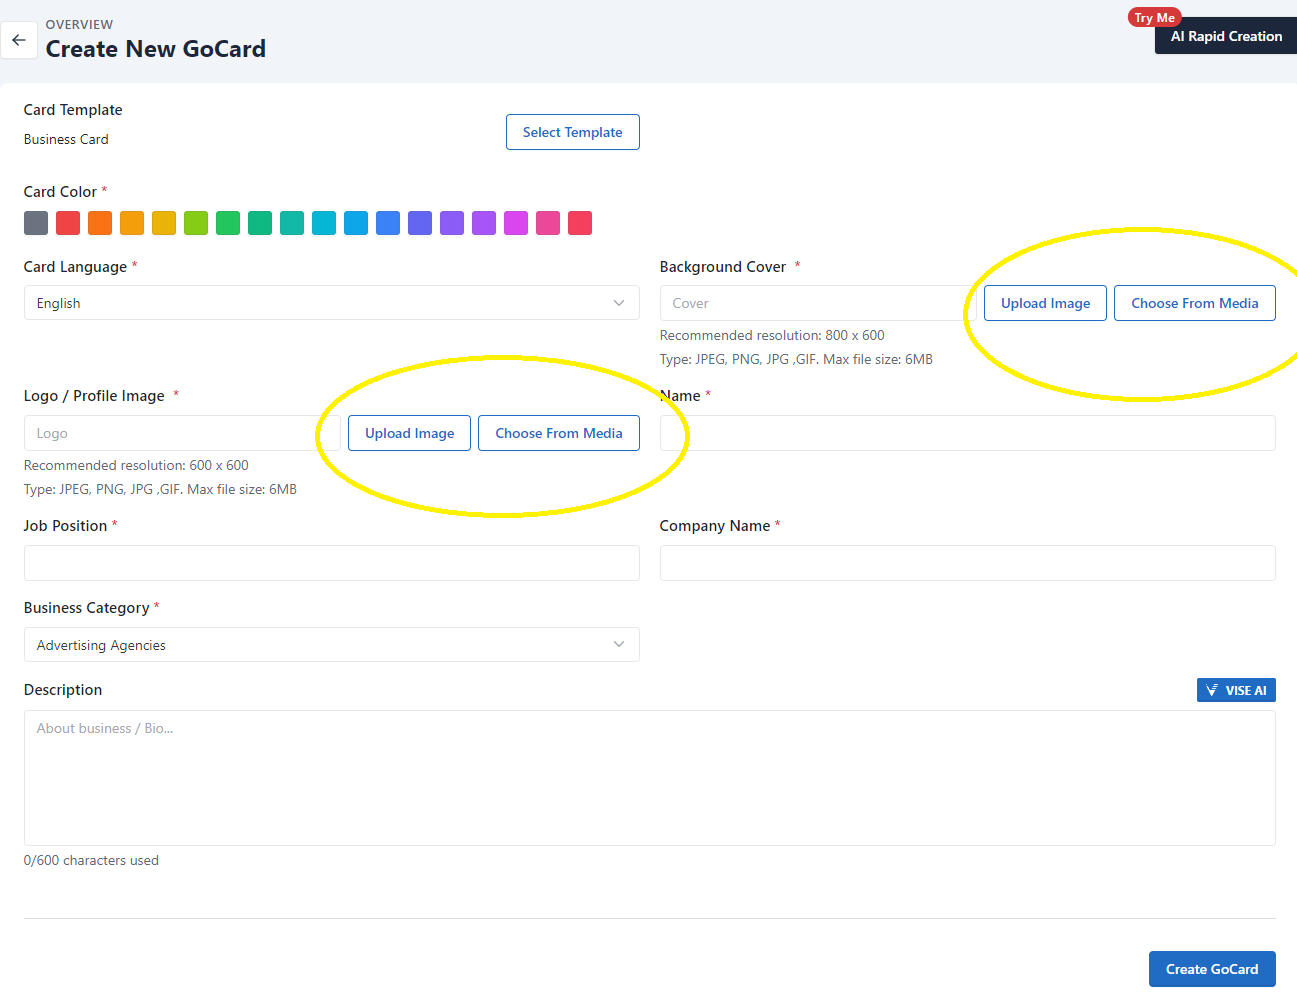
Step 11: Adding Profile Image/Logo and Background Cover
You can upload a main image for your GoCard from here. You are able to “Upload Image” from your device or “Choose From Media”, which lets you choose from a collection of images that you uploaded before.
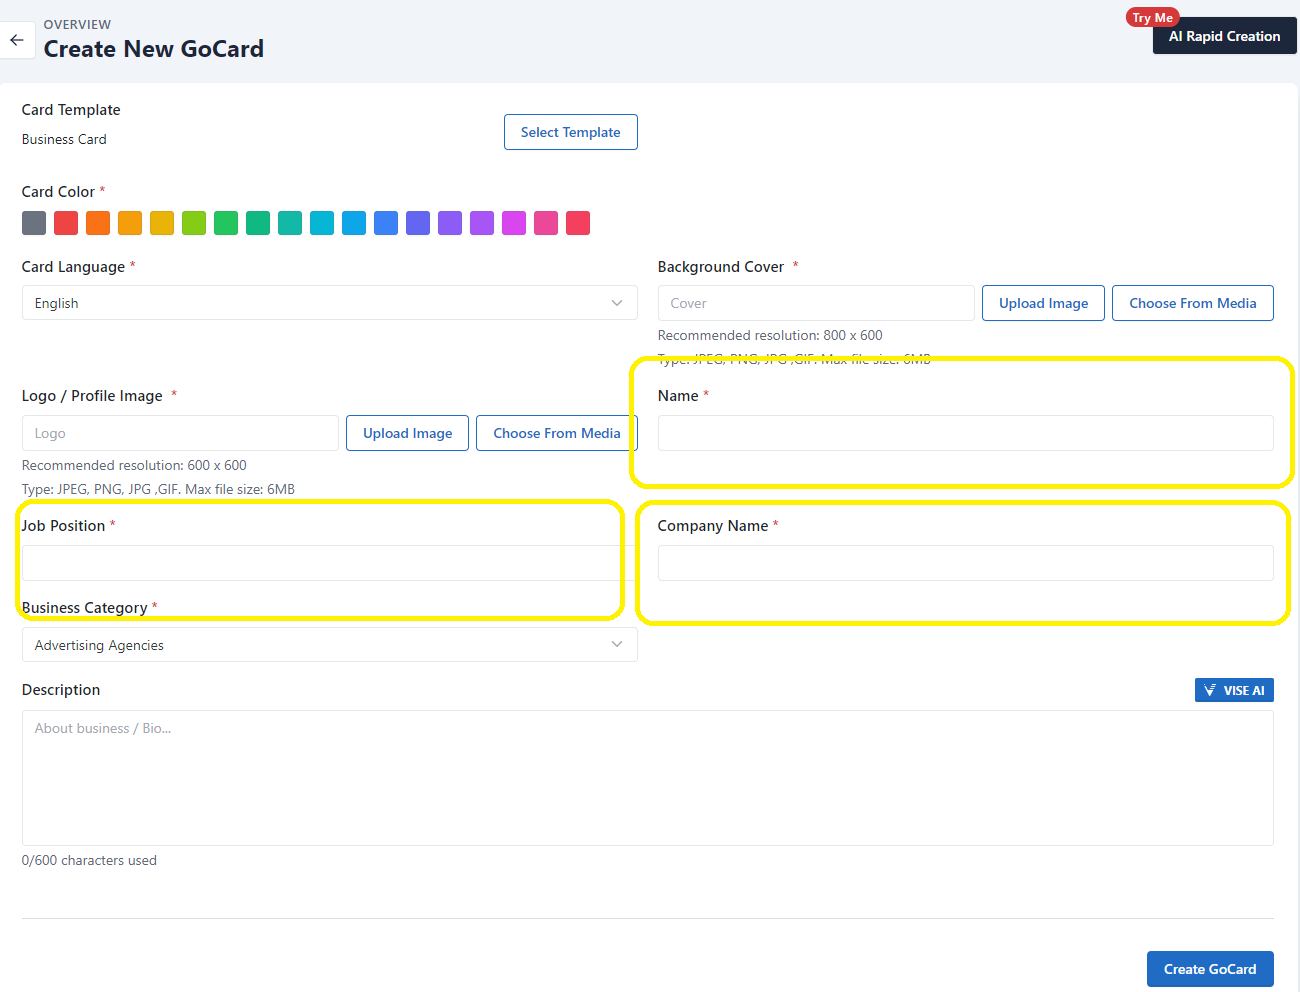
Step 12: Add Basic Details
Type in your “Name”, “Job Position”, and “Company Name” that you wished to appear in your GoCard.

Step 13: Selecting Business Category
Select a “Business Category” that suits the theme of your GoCard.
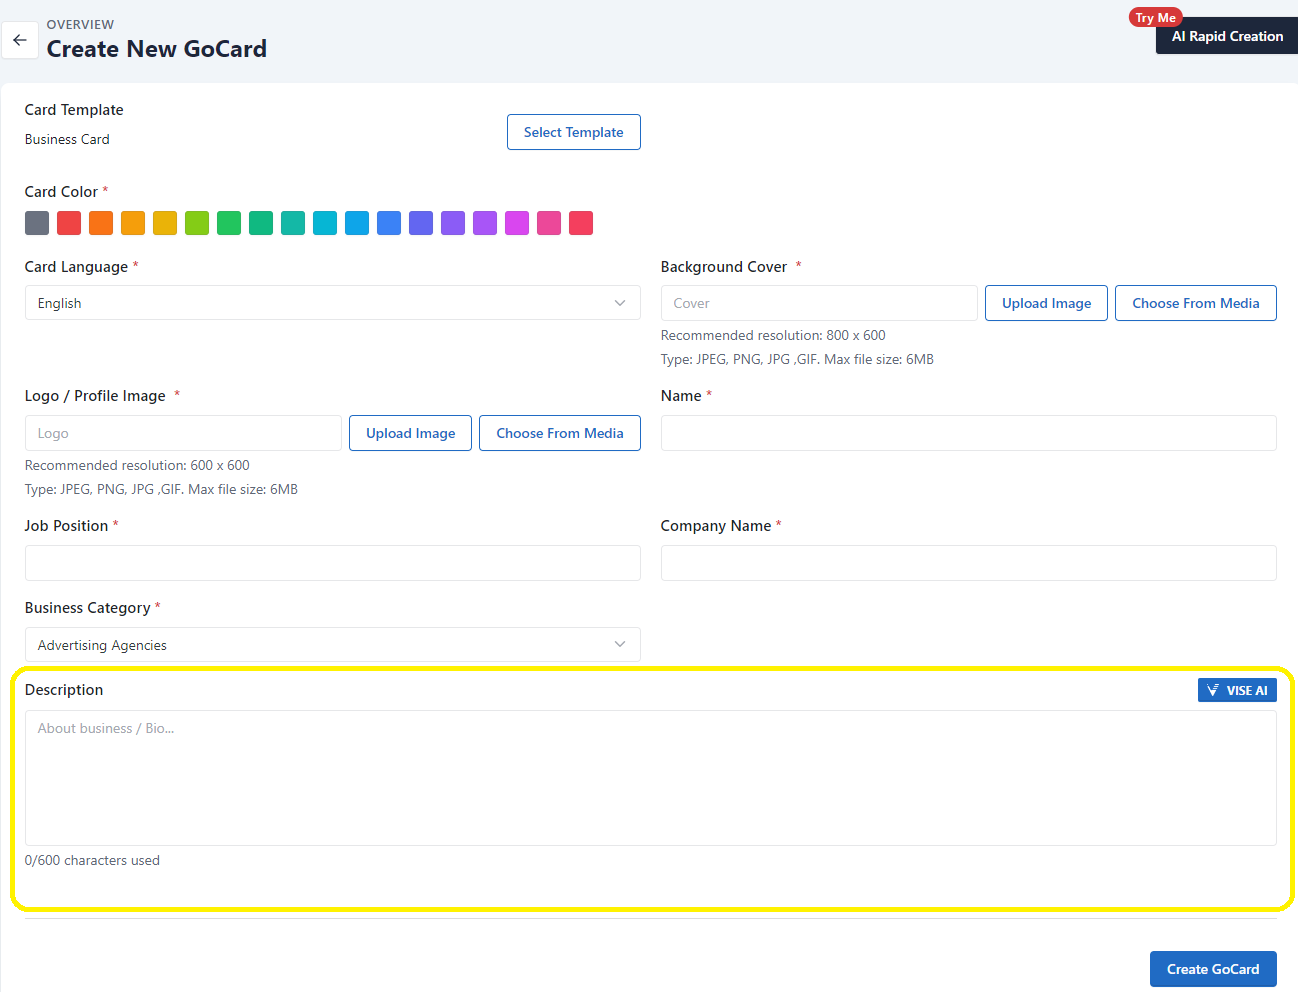
Step 14: Add Description
You can type in your desired description that describes the content of your GoCard.
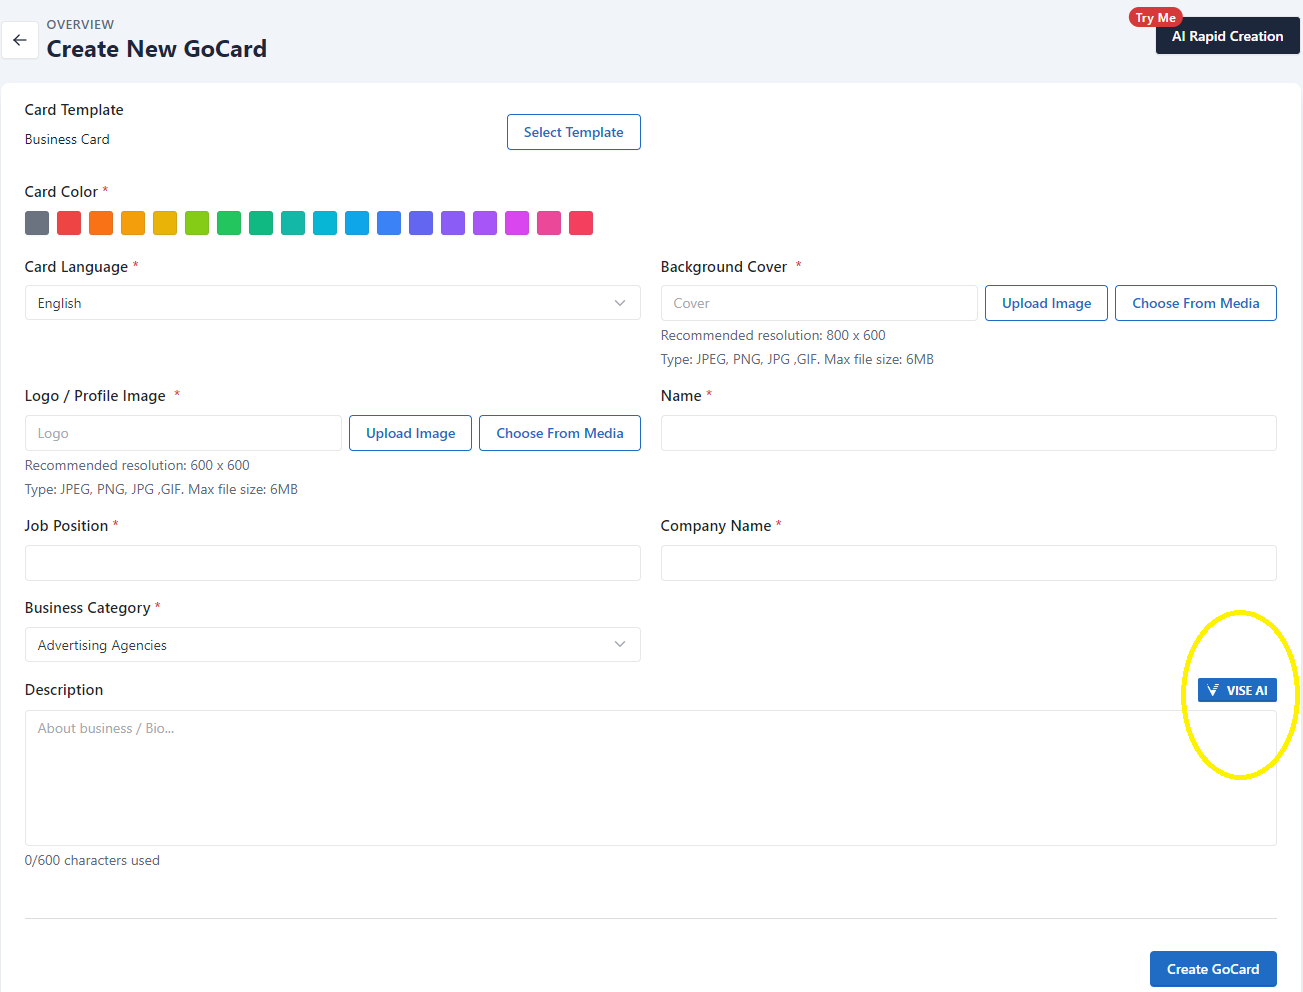
(Optional) Step 15: Generate Description Using Vise AI
Alternatively, you can click on “VISE AI” to creatively generate a description for you. Check out this tutorial -> Generating Content Using VISE AI (Easy Mode) to learn how to use VISE AI!
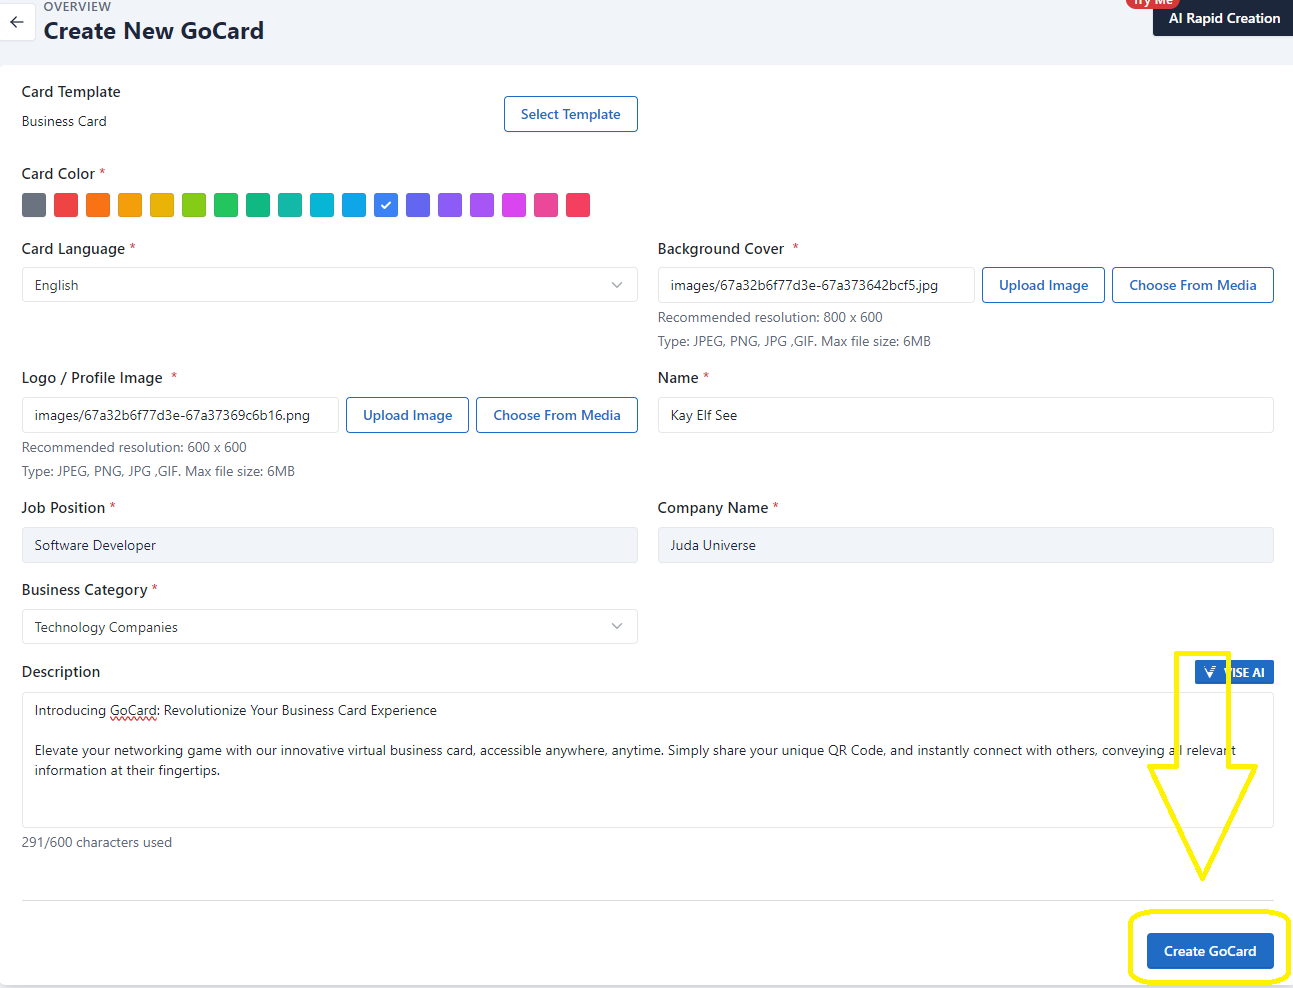
Step 16: Confirm Creating of GoCard
After filling in all fields, click on “Create GoCard” to publish your GoCard!

Step 17: View Your Newly Created GoCard
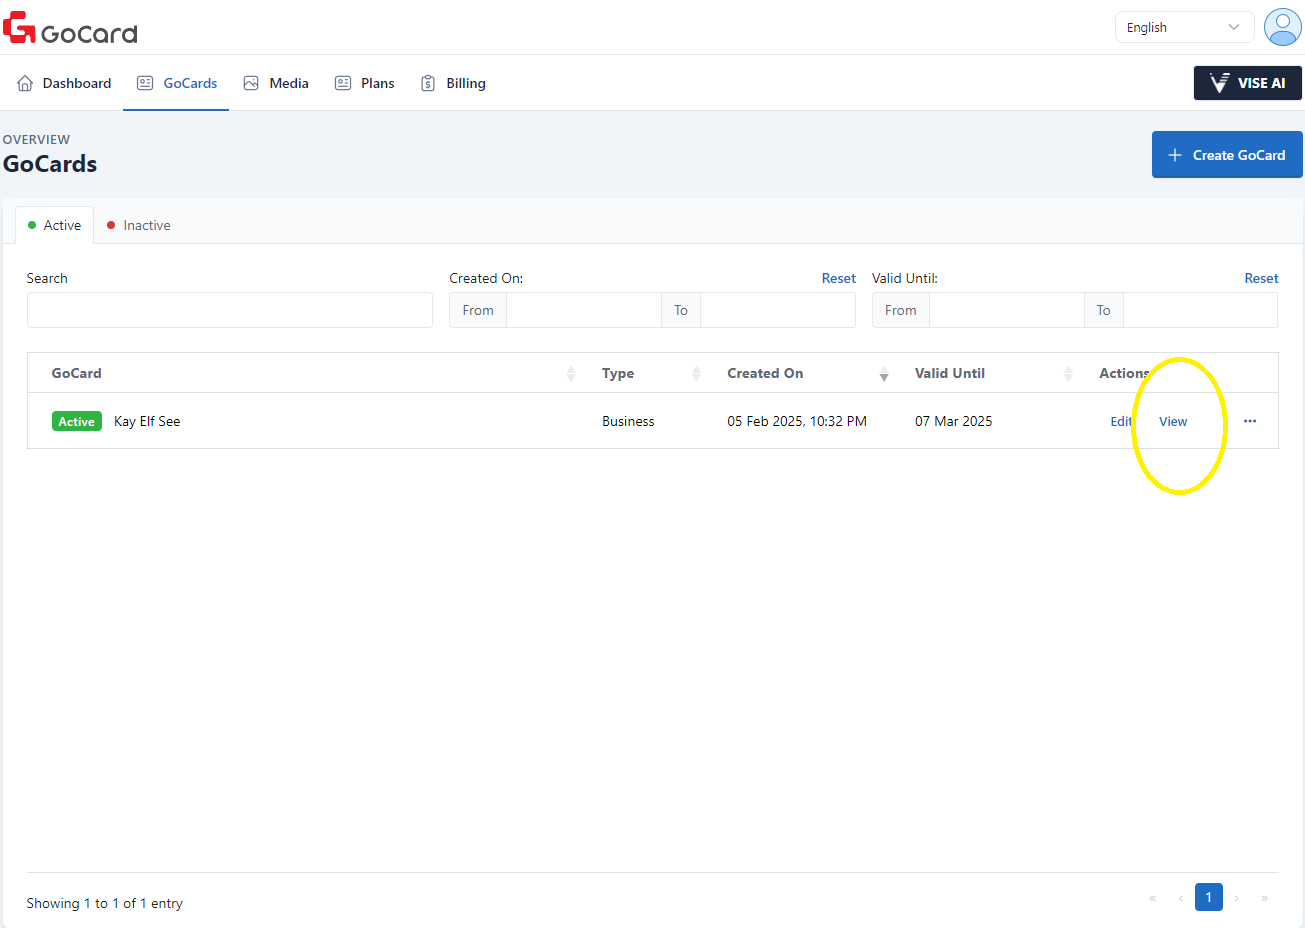
After creating, you will see all GoCards created by you here.
Step 18: View All Details of your GoCard
Clicking on “View” allows you to have a quick look at your GoCard.

Step 19: Finish Creating GoCard
Tadaa! Now you have a base GoCard for your business. Follow our next step Step 2 - Add Contact Info to explore more functionality and make your GoCard more professional!