Tutorial - Creating Appointment
Search:

Step 1: Getting Started
Welcome! In this tutorial, we will be showing a step-by-step tutorial on learning to use GoCard appointment feature. Click on the "Appointments" tab when you have log into the GoCard's dashboard.

Step 2: Configuring Appointment Settings
Click on “Appointment Settings”.

Step 3: Create a Time Slot Preset
Click on "Create Time Slot Preset".

Step 4: Enter a Preset Name
You may enter a name for the current preset under the "Preset name" field.

Step 5: Select a Day to Configure
Click on a day to configure their time slot individually.

Step 6: Choose a Time Slot Interval
Choose a time slot interval of 30 minutes or 1 hour. The time slots below will change accordingly based on the time slot interval you choose.

Step 7: Configure Available Time Slot for Appointment
Now you can set the availabilty of each time slot by enabling or disabling a time slot.

Step 8: Save the Time Slot Preset
Click on "Create Appointment Time Slot Preset" to save the time slot preset.

(Optional) Step 9: Edit the Time Slot Preset
Here you can view all the time slot presets that you created. Click on "Edit" to edit the preset name or time slot availability if needed.

Step 10: Apply Appointment Settings
Click on the "Appointments" tab. Next, click on "Appointment Settings" to go back to the setting page.

Step 11: Apply Appointment Settings on GoCards
Here you can view all your GoCards. You can select an Appointment Settings (Time Slot Preset) that you created and apply it to your GoCards. If an appointment is not needed for your GoCards, you can select "Disable Appointment".

Step 12: Save Appointment Settings
After that, click on "Apply Appointment Settings" to save your configuration.

Step 13: Update Appointment Settings
Click on "Update" to confirm saving your configuration. However, be aware that updating the appointment settings will automatically cancel the previous appointments that you have accepted. It is advised to inform the person involved or make the changes after all appointments have been cleared.

Step 14: Configuring More Settings
Click on "Setting" to configure more appointment settings.

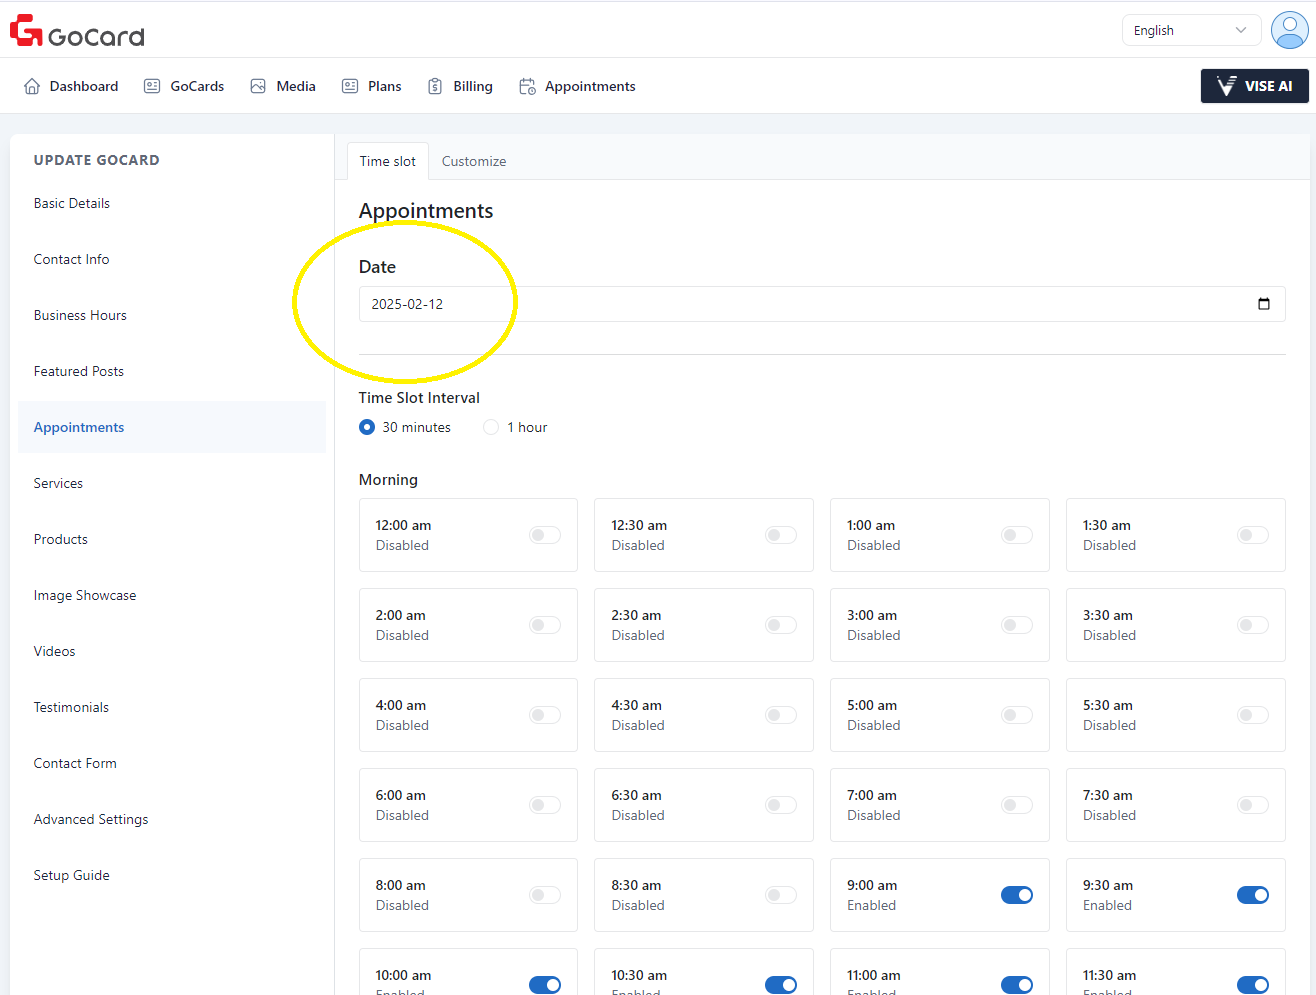
Step 15: Set the Appointment Time Slot availability Based on Date
Instead of selecting a day, you can also set the time slot availability based on a specific date by selecting a date here.

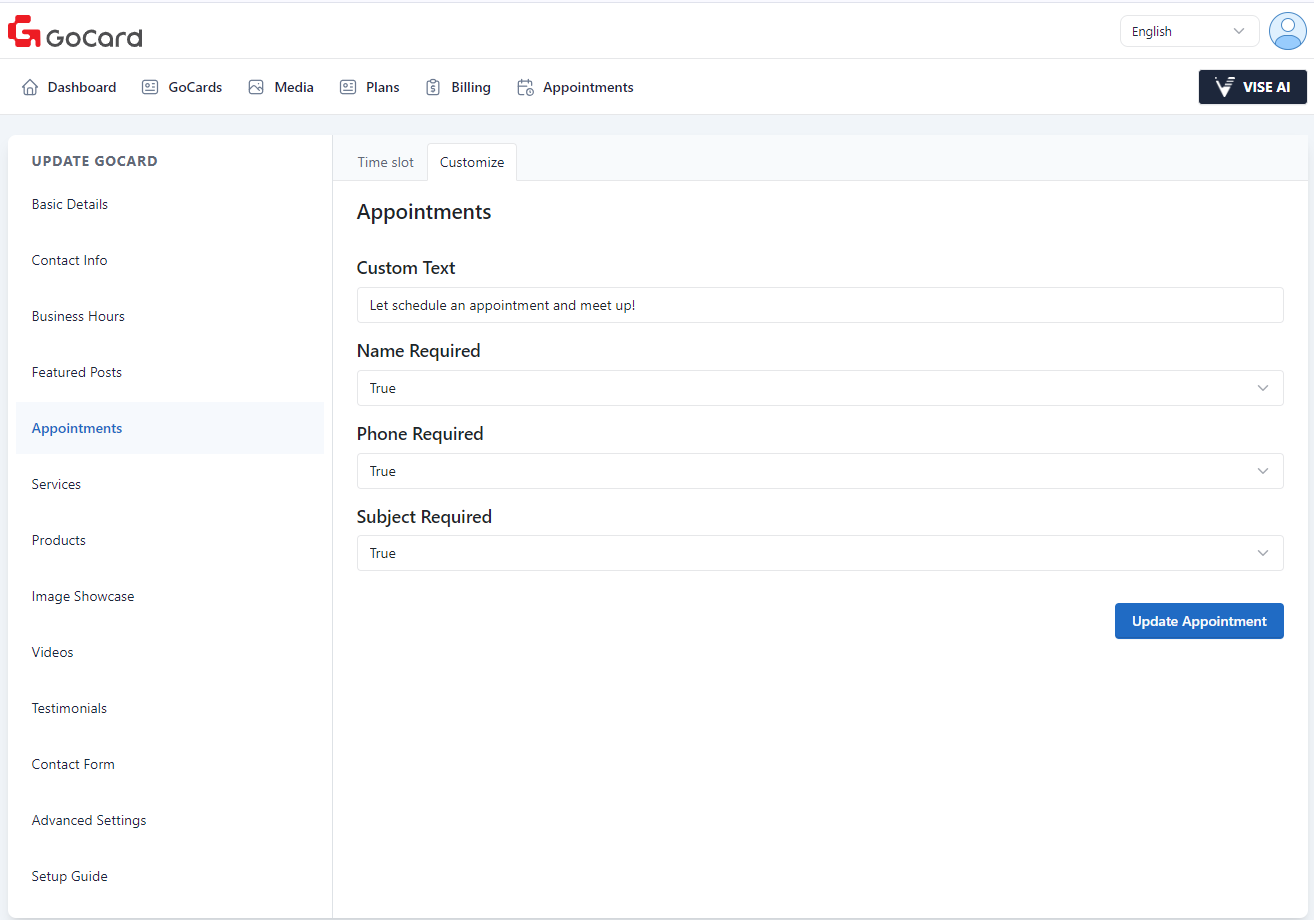
Step 16: Customize More Settings
Click on "Customize" to enable more configuration option. You can add a message by entering it in the "Custom Text" field. Furthermore, you can also set whether the "Name", "Phone", or "Subject" fields are mandatory in the appointment form.

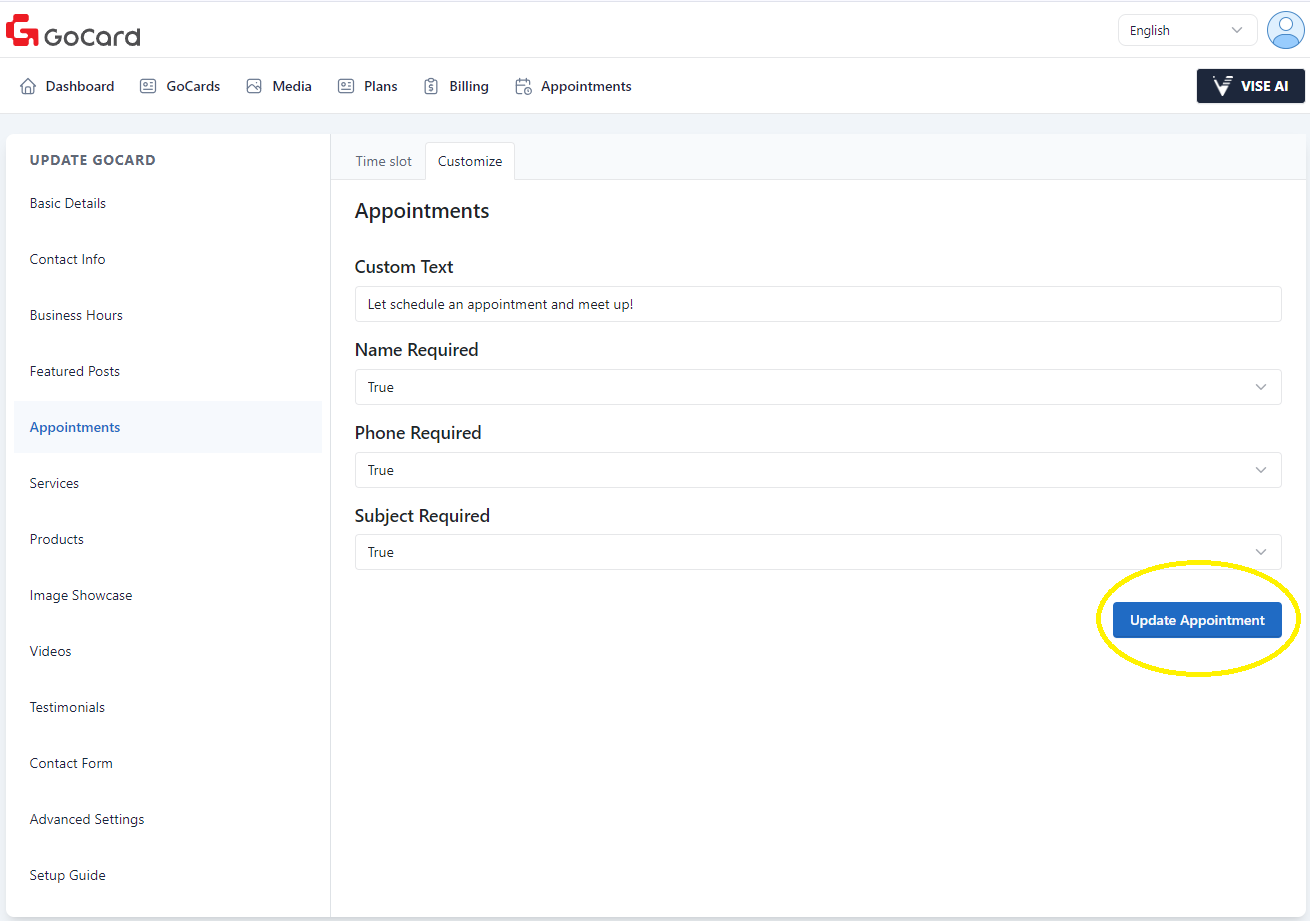
Step 17: Save the Customized Settings
After that, click on "Update Appointment" to save.

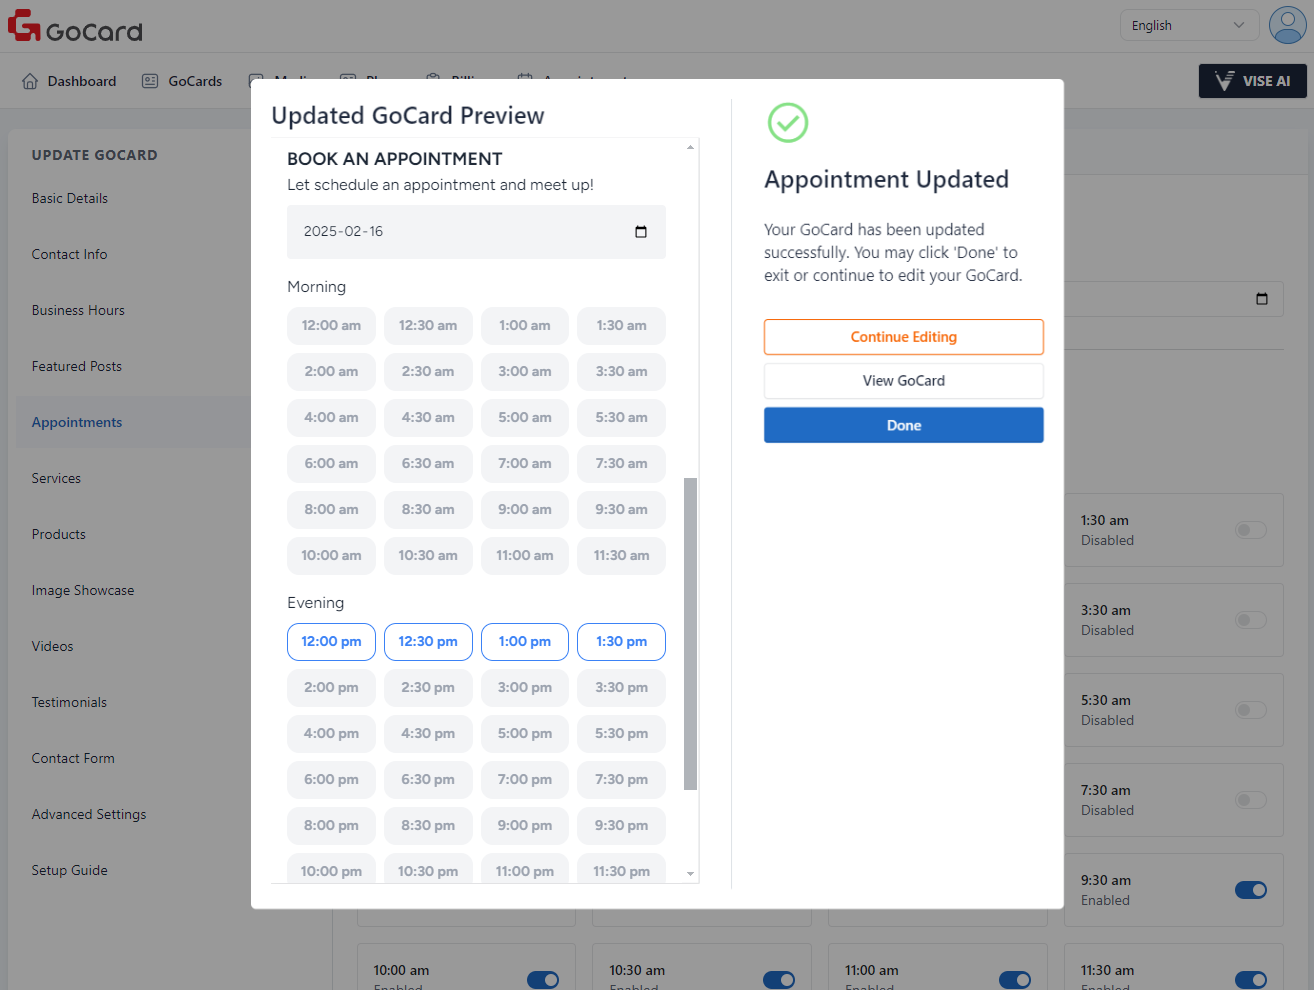
Step 18: Review the Updated GoCard
Next, an updated GoCard preview will be shown. You can review the appointment section you just created and click on "Continue Editing" or "Done" to exit the preview. Now, let's proceed to the next tutorial on Booking Appointment!